National Metrology Research
SPIP™ was originally developed in close collaboration with national metrology institutes (NMIs) leading within the field of nanometrology, and possesses unique features for calibrating in particular scanning probe microscopes (SPM) at the nanoscale.
The majority of national metrology institutes use SPIP™ in their research in fundamental physics and in the development of new calibration methods as well as in their calibration and testing services. Calibration and testing services where SPIP™ is used do not just include measurement of lattice constants, linearity, and step height, but also roughness measurements and particle size measurements. NMIs often both use commercially available SPMs. But many have also built their own high precision instruments for which Image Metrology has developed file format support in SPIP™.
An important part of the work of NMIs is international comparisons which ensure equivalence all around the globe. Several international key comparisons and supplementary comparisons in nano scale calibration have been conducted over the years. The majority of participants using SPMs in these comparisons have been using the calibration functions in SPIP™.
In fact, in 2014 the first ISO standard for determination of geometric quantities using SPMs and for calibration SPMs was published (ISO 11952:2014). Several of the methods described in this standard correspond to functionality in SPIP™.
CASE: Danish Fundamental Metrology Institute
 Danish Fundamental Metrology (DFM) is designated to be the Danish national metrological institute (NMI) and has an obligation to conduct fundamental research within metrology. DFM is obliged to share knowledge and ensure that the knowledge obtained from national and international projects will benefit the industry by offering consultancy, calibration and measurement services.
DFM provides critical infrastructure to the Danish industry by providing traceability at the highest possible international level within metrology.
DFM uses SPIPTM in their nanoscale research and calibration services, spanning from certification of particle size to calibrating step heights and lattice structures. Senior scientist Jørgen Garnæs is happy to explain why: “For our activities SPIP is indispensable. Danish Fundamental Metrology use it as the only software tools for AFM analysis and calibrations of nanometer scale standards with international recognition. For special applications, the possibility to write tailored plug-ins is unique and easy to use.”
CASE: The German National Metrology Institute - PTB
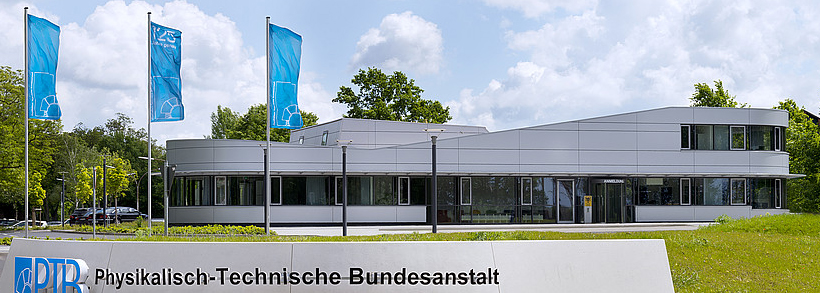
At the German national metrology institute PTB (Physikalisch-Technische Bundesanstalt ), SPIP™ is widely used as the main routine tool for the analysis of surface topography measurements on the micro- and nanoscale. While in the beginning, the software package was solely applied for AFM and STM images, it is increasingly appreciated also for the quantitative analysis of images recorded with various other surface measuring techniques and thus increasingly used more broadly in a number of working groups with different focus.
 Ludger Koenders, head of the department "Surface Metrology" explains how the software is used: ”At PTB I have been using SPIP™ from the very early days of the software more than 20 years ago, for measuring precisely critical dimensions from AFM images, such as step height and lattice constant of gratings. As SPIP™ users we have significantly influenced the evolution of SPIP™ over the years.” For more than two decades now, the direct contact to the software developers has greatly helped to take the emerging demands of PTB as one of the world’s largest metrology institutes into account, so that new functions and options could be implemented promptly. The software package has thus matured into a generally versatile and particularly reliable tool for image analysis.
Thorsten Dziomba, scientist in the department "Dimensional Nanometrology": “Right from the beginning of my work in the field of AFM calibration services, I’ve been using the core metrology functions such as step height and grating analysis, and appreciate that Image Metrology has always been taking our concerns seriously, e. g. when it comes to the treatment of data derived from non-perfect, irregular or contaminated samples. Analysis routines have been adjusted in a way that bad data can be identified more easily and consequently excluded, which is important for efficient routine services. SPIP™ is always the main tool to analyze the broad range of nanoscale research measurements we do, whether it is measurements at quantum devices, novel materials, nanoparticles or novel roughness standards, not only with AFM, but also other techniques. There is hardly any software package that has so many import filters to read the measurement data files of many microscope manufacturers. It is a great advantage that we can read the data of different instruments and analyze the images in the very same way. This ensure good comparability.”
The latter has become particularly important with the optical surface measuring techniques emerging, e. g. confocal laser scanning microscopy and interference microscopy. As a metrology institute, it is vitally important to carefully investigate the different imaging and measurement properties of the instruments, for example in view of surface roughness.
With the publication of the first ISO standards on areal roughness analysis, Image Metrology has implemented the appropriate routines and also enlarged its tools for profile analysis, thus upgrading SPIP™ also for roughness analysis according to standards.
Thorsten Dziomba continues: “A great advantage of this software package is that it allows a straight-forward use, with a clear focus on what is important for a metrologist, on what is relevant in dimensional surface metrology, without getting lost in a confusing jungle of unnecessary extra functions hardly anybody needs. The direct access to the developers ensures that mathematical problems can be discussed – and solved – in a scientifically profound manner. This is decisive for the use of SPIP™ in critical applications such as official calibrations and international comparisons.


