How to get started
Getting started using SPIP™
- Download, install and activate SPIP™ by following the instructions on the download page
- It is recommended to watch the Getting Started video tutorial – it is less than two minutes!
- Now try to repeat the same procedure by following the instructions below, where a few extra work items have been added
- See more video tutorials in the Media Library and try more things in SPIP™!
Opening an image
First open an image, for example the first one on the Welcome Screen. To open one of your own images click the Browse button on the Welcome Screen or Open or Browse in the File menu and browse to an image folder. Note that the ImageMet Explorer browser may take a little while for generating thumbnails if there are many files in a folder.
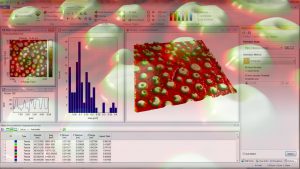
When an image is loaded (or selected) a set of ribbon tabs with image analysis tools will show up.
Plane Correction
Most SPM images, especially height images, will have tilt because the scanning plane and the sample surface plane are tilted slightly relative to each other.
In the Modify panel on the General ribbon tab click the Plane Correction button and select the Global Leveling option. This will subtract a plane from the image. Now the low features in image stand out more clearly.
The Modify panel on the General ribbon tab contains some of the frequently used functions found on the Modify ribbon tab. The Plane Correction button just used is a QuickLaunch button. It executes Plane Correction using previously stored settings - in this case built-in settings. The settings reflect a particular configuration of the advanced Plane Correction dialog.
Cross Section Profiling
Cross Section Profiling is used for viewing and analyzing the image contrast along line in a graph and is one of the most intuitive as well as quantitative ways of studying and evaluating the point data (for example height) in an image. SPIP™ offers unsurpassed flexibility for cross section analysis.
On the General ribbon tab click the Horizontal Cross Section button in the Cross Section Profile panel to draw a horizontal cross section. A new window with the cross section curve is now displayed. The profile in the image can be moved by dragging the mouse. By first selecting the profile in the image and then pushing the up/down arrows on the keyboard, the profile can be moved exactly one scan line at a time.


