The ImageMet Explorer™ is a productivity tool dedicated to SPM and topographic images. Like other browsers it allows you to browse and select files by thumbnails. The difference is that the SPIP browser recognizes 100+ specialized file formats and that it enables you efficiently to browse and select data inside multi object files for processing in SPIP™.
Basic properties, such as width and height for images, can be previewed and used for sorting. Thereby, it is easy to find and open exactly those images or curves which are of interest, and limit the number of data windows to those that have your interest.
The ImageMet Explorer looks and feels like a normal Windows file explorer but has been tailored for exploring files, which can be opened by SPIP™. So, though ImageMet Explorer is a highly specialized program for exploring data for SPIP™ the basic way of operation should be familiar to most users.
The ImageMet Explorer is started from the File>Browse button in SPIP™ or the “Browse files” button on the
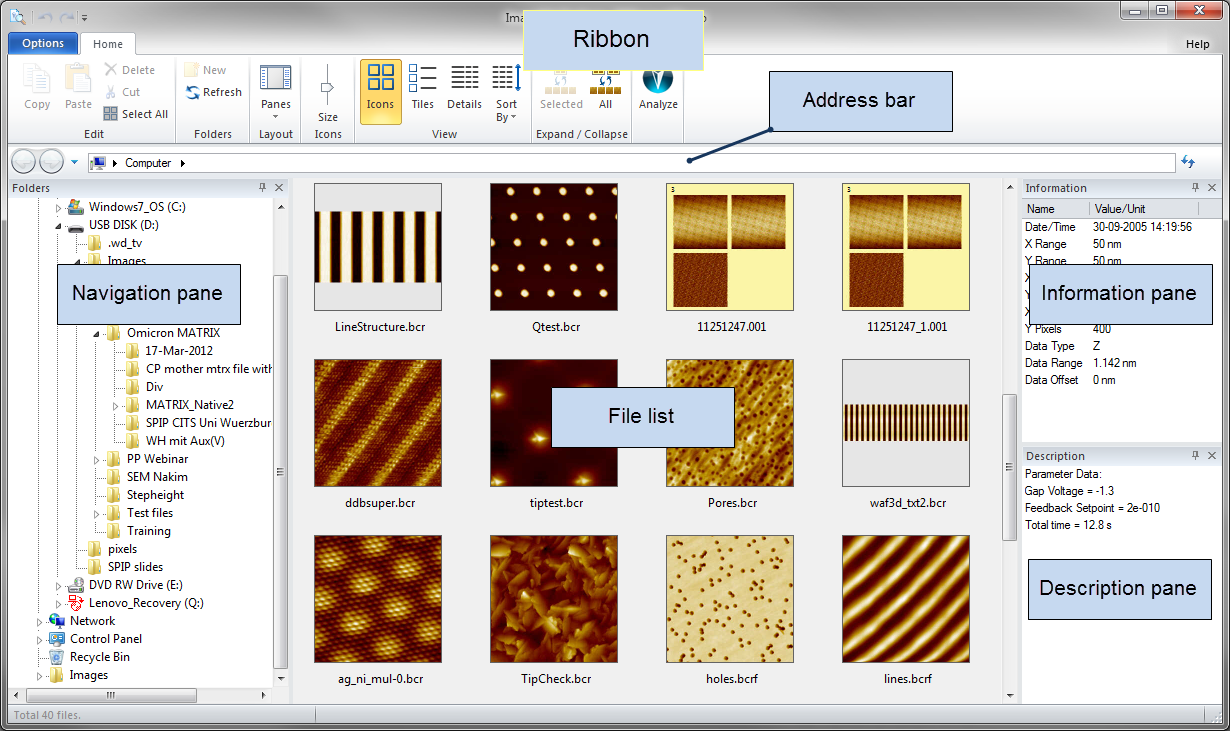
The central part of the application window is the File list showing the actual list of files or file objects of the currently selected folder.
Above the File list is the ribbon with all controls for the program.
In the left side of the application window there the folder Navigation pane, for navigating through disk drives and folders. The Navigation pane holds a traditional folder navigation tree. Just above this pane there are convenient forward/backward buttons and the Address bar.

To the right of the file list the Information pane and Description pane are docked one above the other.
The Information pane displays basic properties for the selected file or object, such as dimensions and resolution. The Description pane displays supplementary information, which may be very specific for the kind of file being explored. The same information is displayed in the Description field in the image or curve Properties dialogs inside SPIP™. In some case ImageMet Explorer shows a short version of what is shown in SPIP™ in order to make it easier to get a quick overview and to increase browsing speed.
The three panes can be toggled on and off using the pane button in the ribbon or hidden.
The Information and the Description panes can also be resized and moved around, docked and tabbed like the panes in SPIP™. For docking or tabbing, grab the title bar in a pane using the left mouse button and position the mouse over one of the displayed docking hints.
The File list has three viewing modes:
Icons view for compact thumbnail browsing suitable for getting and overview of data and to zoom in on details by changing the icon size.
Tiles view is an extension of the Icons View which in addition to displaying the file name on the right side of each icon also displays the creation date/time, the physical size of the object in one direction, and the type of data primary data type represented by the object.
Details view for easy overview and for selecting a range of objects sorted by one of the available columns.

The icon size in Icons view and Tiles view is changed by dragging the Size slider in the ribbon. As resizing is extremely fast, this is a convenient way for zooming inside the File list. A good overview is achieved with small icon sizes, and details can be explored with big icons. The icon sizes range from 32x32 pixels to 256x256 pixels. In the Details view, the icon size is fixed at 32x32 pixels.
Note, that all images are background corrected in order to improve contrast – this makes it easier to explore and identify data. The correction is a subtraction of a fitted intensity gradient which for height data corresponds to the subtraction of a fitted plane (like Global Leveling in SPIP™). When the images are pushed to SPIP™ it will be the raw data which is shown. Therefore, the raw data shown in SPIP™ will often look different to the enhanced versions of the images shown in the ImageMet Explorer.

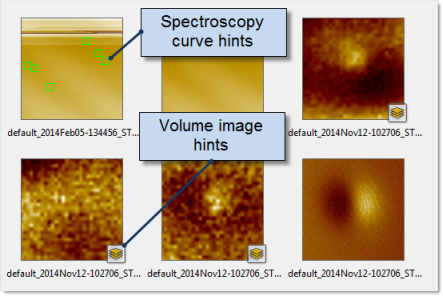
It is easy to distinguish curves from images because the icons are previews of the actual data. But in case of volume images or data cubes, e.g. Force Volume images and CITS images, the preview (and the view inside SPIP™) is just a slice through the cube, and therefore looks as any other image. In order to make it easy to identify volume data, the previews are decorated with a small icon indicating that they are volume images. Similarly, images containing single point spectroscopy curves are decorated with small hints showing the positions of the recorded curves.
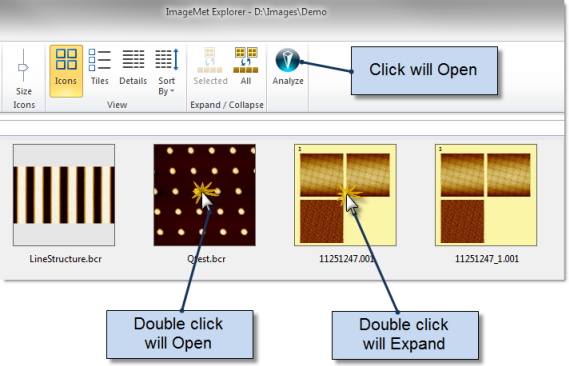
A data object (image or curve), or all data included in a multi object fie is opened in SPIP™ by clicking the Analyze button in the ribbon. Single data objects can also be opened in SPIP™ by double clicking the object’s icon in the File list, while double clicking multi object files will show the files in expanded mode and allow you to select specific objects in this file for processing SPIP™, see below.
Alternatively, data can also be opened in SPIP by drag-dropping.
In several SPM data formats each file can contain several data objects (images, curves, etc.). These can for example be the different channels recorded simultaneously. Such files are at the file level represented by a yellow icon containing thumbnails of the first four objects in the file. When such a file is double clicked or when the Expand Selected button in the ribbon is pressed the content of the file will now be displayed. If you want to open the file instead of expanding it just select it and click the Analyze button in the ribbon. In some cases it is useful to expand all multi object files in a folder. In that case click the Expand All button in the ribbon.
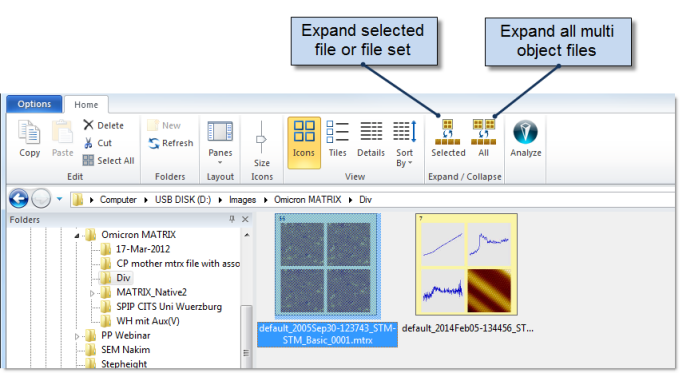
An Omicron MATRIX Result File (of type *_0001.mtrx) is regarded as a multi object file even though the actual data is located in a multitude of Result Data Files. The Result Data Files, which each can contain multiple objects, are also expanded when the Result File is expanded. Images with single spectroscopy curves are decorated with the positions of the recorded curves, whereas the curves themselves are not displayed until the corresponding image is opened in SPIP™. Note, that when copying or deleting an Omicron MATRIX result file, then the entire set of files belonging to that experiment (Result File) is copied or deleted, respectively. Omicron Scala Pro files of type *.par are handled in a similar way.
Files - or objects contained in files in expanded view – can be sorted by a pre-selected number of Information fields plus an index number, see later. Sorting in either ascending or descending order is performed either by clicking the Sort By button in the ribbon and making the desired selections or by clicking the relevant column in Details View mode.
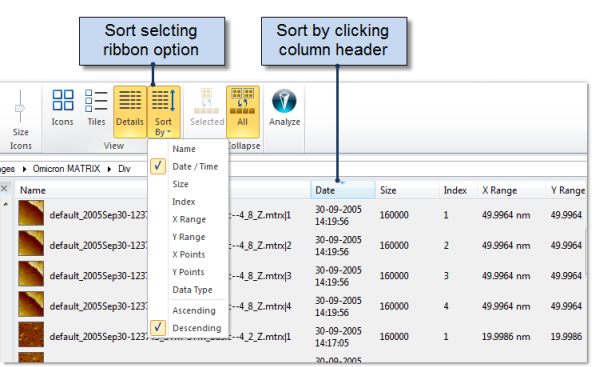
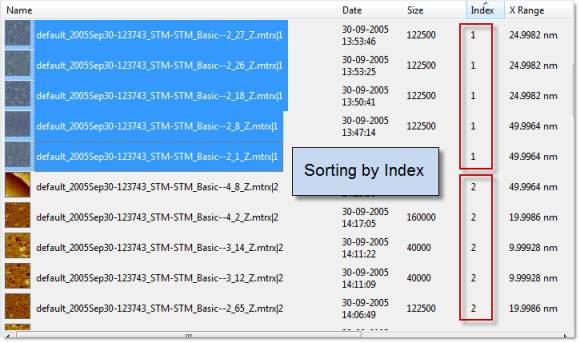
For many purposes but especially for Batch Processing it is desirable to open a specific channel from a number of multi object files. This can be done by expanding all multi object files by clicking Expand All and then sort the objects on the “Index” field. The index field will in most cases represent a specific channel or scan direction but is basically just the sequence number of an object in a multi object file. By sorting it is easy to multi-select a range of objects which has the same Index number from a large set of files. Therefore a specific channel from multiple files can be selected and processed together.

Copy will copy one or more selected files to the clip board. The objects of an expanded file cannot be copied. If one needs to extract for example a single image from an expanded multi object file, that image will first have to be opened in SPIP™ and then saved from there in one of the save formats supported by SPIP™.
Cut will copy a selected file to the clip board and delete the file once it has successfully been pasted into a target folder.
Paste will insert the file(s) on the clip board into the currently selected folder.
Will delete the selected file(s)
Will select all objects in the File list.
Will create a new sub-folder in the selected folder. It requires that a folder has been selected in the Navigation pane.
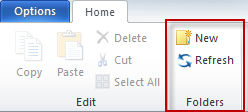
Will re-scan files in the currently selected folder and generate new thumbnails.
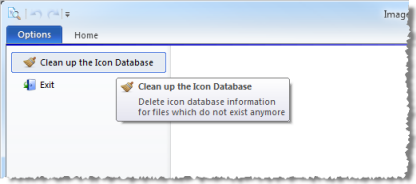
Thumbnails and basic information for files which have been browsed with the ImageMet Explorer are stored in a database in the user’s AppData folder. If any of the files browsed are moved or deleted by another program ImageMet Explorer might not be aware of it. Hence, the database can contain data for which there a no more d files, which just takes up space and reduce performance. In order to get rid of obsolete entries in the database the program can clean up the data base. This is done clicking the Clean Up button on the Options back stage menu.
