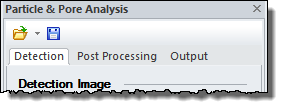
The pane which is dock-able consists of three tabs (Detection, Post Processing, and Output), a Detect button and an Auto Detect check box and a toolbar containing tool keys for loading and saving settings. See the layout in the Introduction.
Save the current set-up to a file. This embraces all settings (Detection, Post Processing, and Output) including the selected Parameters, Statistics and Charts.
Loads previously saved settings into the Particle & Pore Analysis pane.
When this button is pushed a detection according to the shown settings is performed using the image set as Detection Image. If no image has been set SPIPTM will in the case that only one image window is present perform automatically set this image as Detection Image. In case there are multiple images present SPIPTM will suggest the currently active image window. In case the currently active window is not an image window SPIPTM will suggest the Main window image as Detection Image.
Auto Detect
When this option is enabled SPIPTM will automatically perform a Particle & Pore detection whenever one of the parameters on the Detection tab is altered.
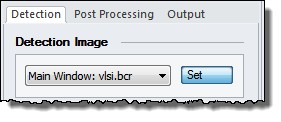
The Detection Image which is used for the detection of features. Select from the drop down list or click on the image and then push the Set button. SPIPTM automatically sets the currently selected image as Detection Image when the Particle & Pore Analysis icon is pushed in the ribbon. If no image has been set SPIPTM will in the case that only one image window is present perform automatically set this image as Detection Image. In case there are multiple images present SPIPTM will suggest the currently active image window. In case the currently active window is not an image window SPIPTM will suggest the Main window image as Detection Image.
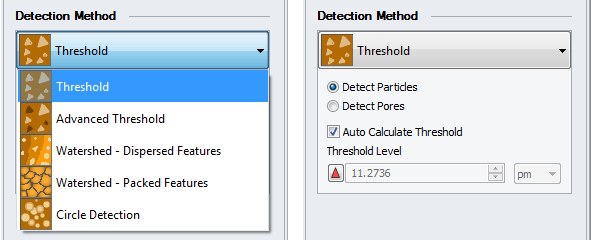
Use this drop down list to select one of the four detection methods. See the guide earlier for help in selecting the right method. Find more details on how the methods work in the reference guide.

Select the type of features you want to detect. Particles are features with Z values higher than the Threshold Level. Pores are features with Z values lower than the Threshold level. Note that when the “Preserve Holes in Shapes” option is enabled on the Post Processing tab Particles can have interior pixels lower than the Threshold Level and vice versa for Pores.
Enable this feature to have SPIPTM calculate a Threshold Level automatically. Disable to allow entering a Threshold Level manually.
Enter a Threshold Level value, use the spin buttons or drag the connected Color Clip Marker in the image window. Select the desired unit before entering a value.
This button shows a horizontal arrow when the Threshold Level is at the same level as the lower (Pores) or upper (Particles) Color Clip Marker in the image window. When pointing up it means that the Clip Marker in the image window is at a higher level than the displayed Threshold Level and vice versa when the indicator is pointing down.