SPIP contains tools for designing your own color scales select among predefined color scales that determines how the image data are visualized.
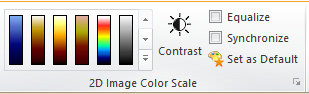
The Color Scale Panel of the Image Ribbon facilitates an easy selection of predefined built-in or custom made color scales.
When the mouse is hovered over the Color Scale inside an image window, small triangular markers show up on each side of the color scale.
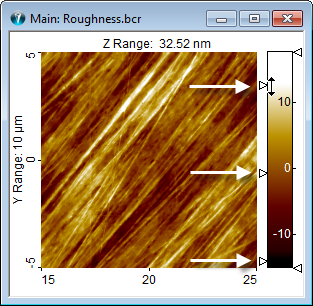
The three markers on the left side are for adjusting the contrast and brightness in the image. When either the upper or the lower of these markers is moved towards the middle marker, the contrast is increased while at the same time decreasing or increasing the brightness, respectively. If the middle marker, only, is moved it is only the brightness which is changed.
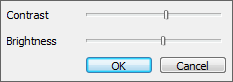
It is also possible to modify the contrast and brightness from a button in the ribbon. This is in particular useful, when the color scale in the image window, by user preference, is hidden, or in the 3D window where there is no interactive color scale. When the Contrast button is pushed a mini dialog pops up. Here the contrast and brightness can be changed. The mini dialog has both an OK and a Cancel button, so that it is possible to regret experimenting with the contrast settings.
The colors of an image can be scaled automatically by defining upper and lower percentile for the associated height range; this is done in the View Settings. By defining the lower percentile to e.g. 1.0% the lowest 1% of the pixels will determine the position of the lower left color marker in the color scale of the image. Likewise by defining an upper percentile of e.g. 98% the upper left color marker will be set to the 98% percentile so that the highest 2% of the pixels will not influence the contrast.
Color scaling by percentiles is a strong technique for achieving a good contrast in images having relative few pixels with extreme values, e.g. noise or contamination on a flat substrate.
The default percentiles are defined in the Preferences Dialog under View. The reason why they are not saved with View Settings, is that it is very rare that one as a user would like to change the defaults
The Color Equalization mode of an image is toggle from the associated button in the 2D Image Color Scale panel of the ribbon or just by pressing Q.
Because the color scale by default covers all the height valued of an image the contrast can be weakened by outlier values causing small features to be invisible. In such cases it can be very useful to apply Color Equalization, which will cause all the different colors to be distributed equally. This will have the effect that the contrast of the small corrugations will improve dramatically, see example below. It is also a strong tool for evaluation of small plane distortions and plane correction. The disadvantage is that the transformation is highly nonlinear and does not provide the correct feeling for the height differences.
|
|

|
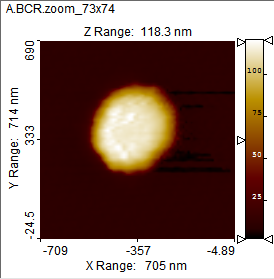
Color Contrast Example: In the first image the contrast markers are at their outer positions. In the middle the upper contrast marker has been lowered so the details of the lower plateau become more detailed. The last image is shown in Color Equalization mode which enhances the details of common height values and by using fewer colors for the slopes.
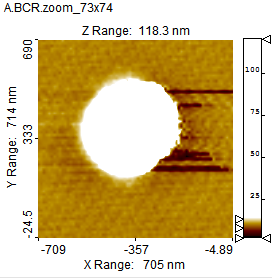
The right markers of the color bar are used for setting threshold values The threshold values are used in connection with more tools e.g. Plane Correction, Particle and Pore Analysis, Fourier Filtering, Tip Characterization and Spike Removal.
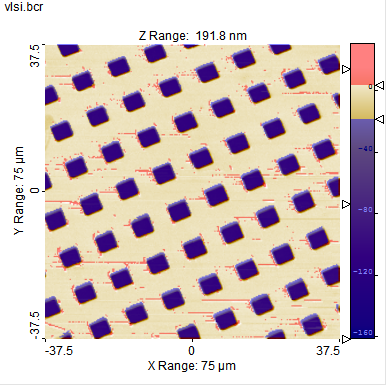
Color Clip Marker Example. The lower color clip marker is set such at all pits are marked blue and the upper clip marker is set so that the high outlier values are marked with a red color.
The color outside the color clip markers will be overplayed transparent colors defined by the View Settings, se below.
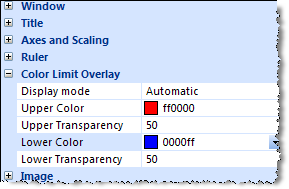
The transparency of the overlay colors can be defined from zero to 100%. The view settings also allow you to turn off the overlay coloring feature, while keeping the ability to define threshold values for the various tools.
The color scale in the image window can be turned On/Off from the Window section in the View Settings Pane for 2D images or by clicking Ctrl+V.
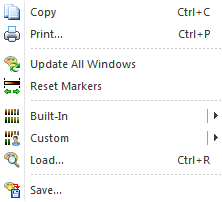
Because the modification of the color scale is reflected simultaneously in the Main Image and the Fourier image you can use the color scale as a WYSIWYG interface to the definition of threshold values for Grain analysis, Fourier filtering and Outlier Filtering. By setting the Update All Windows in the right mouse menu the other 2D Windows will adapt the changes as well.
For the 3D visualization studio the colors will follow the Color Editor for the default settings.
You can edit the color scale easily by the Color Scale Editor window. The window contains three curves: red, green and blue. The colors of the color scale in the lower part of the window are determined by the y-values of the red, green and blue curves. The resulting colors will be a mixture of the relative RGB values.
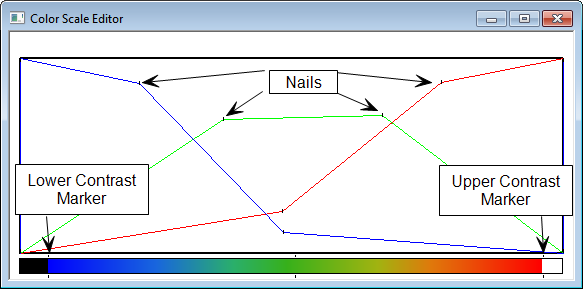
The curves contain nails, which the curves are forced to follow. The mouse can move the nails and new nails can be defined. Between the nails, the curves are linear. On a mouse click, the curve closest to the click point will get a new nail at the click point.
The color scale at the bottom works together with the color scales of the images. It is possible to move the lower left marker of the color scale to the right and thereby turn all the lower colors to the minimum color (usually black). This will give a higher contrast for the middle height values. Likewise, the right end of the color scale can be moved to the left, when clicking on the right side of the color scale. Positioning the mouse pointer in the middle part of the bar can move the entire color scale.
The Color Scale Context Menu is activate by right clicking in the Color Editor windows and provides access to the predefined color scales and saving new color scales.
This state button will cause all image windows to use the actual color scale when set.
By default each image has its own color scale that can be changed independently from the open image windows. You may for example want to use high contrast colors for the Fourier image and the more smooth brown color scale for normal images. However, all images can be set to share the same color scale by right clicking this button.
Click this menu item to reset to Color Contrast Markers to the positions given by the Color limits given in the view settings of the image window
When saving a color scale, the Custom Settings will be suggested as the save folder. When using this folder the stored color scale will be directly accessible from the Color Scale Collection in the ribbon.